Pelican Air 1615 TRVL and the Liberty Sidemount - with parts panel!

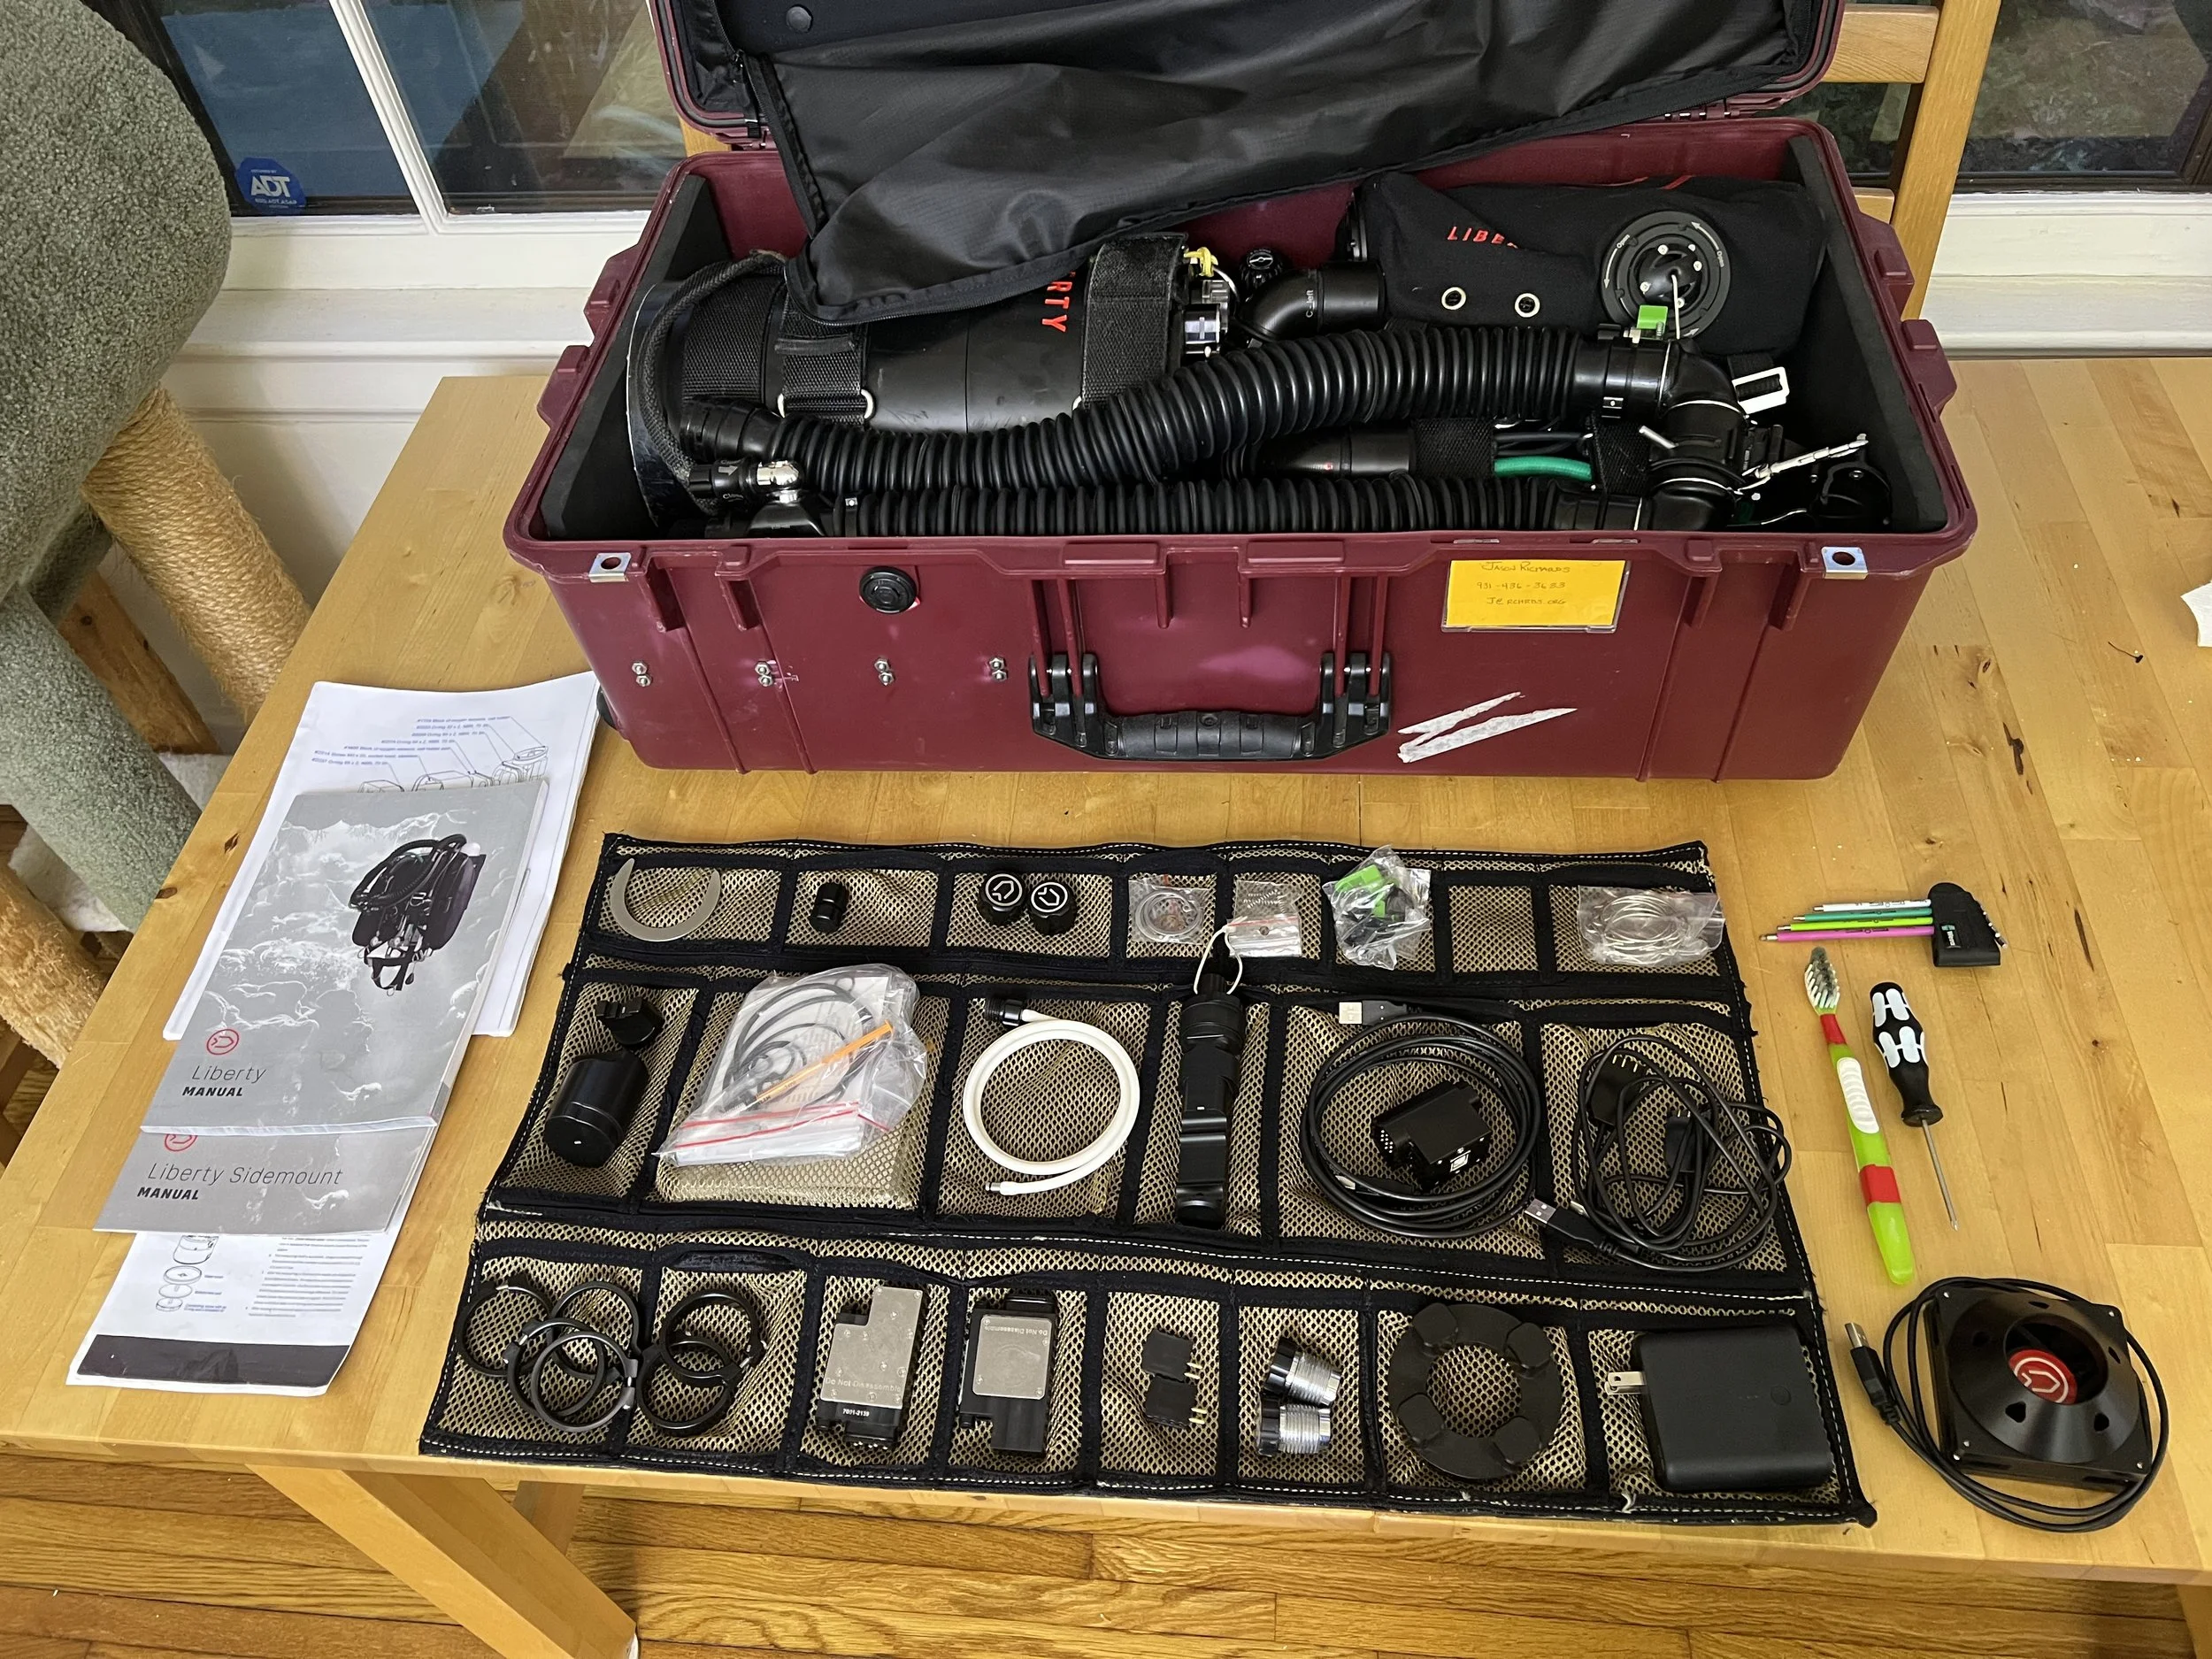
Some folks have been asking about how I configure my Pelican Air 1615 TRVL case to best fit a Liberty Sidemount, along with my home built parts panel, to store all the knick-knacks that come your rebreather.

The Pelican Air 1615 TRVL- the choice travel box for the Divesoft Liberty Sidemount Rebreather.

In the image above is my Pelican Air- you can get these from Divesoft in a flashy red, or you can find them at colorcase.com in a range of bright colors with matching or other color handles and TSA lock latches, or even black or grey, if you prefer more low key at the airport.

In the picture above, you can see the row of stainless steel nuts on the left (wheel) side of the case. These are the back side of the tank mounting brackets mounted in the case visible in the picture below. The stainless nuts and countersunk screws are sealed with acrylic on installation, and hold an aluminum strip that is spaced to hold a set of Liberty Sidemount tank straps for securing the tanks inside the case. The tanks are on the wheel side of the case, so when wheeling the case around, the weight is over the wheels- having the tanks on the other side would be very awkward, which you can tell when just moving the case around loaded.

Extra set of tank straps used to secure tanks to edges of box. Bolt placement, which does not damange the strap, allows use of straps as spares in a pinch.

The foam in the bottom is the standard foam that ships with the case, with the cutouts for the handle and wheels. The foam on the ends is 1/2” XCEL closed cell foam with adhesive backing available from Amazon. These keep the bottles and the scrubber from bumping against the end of the case, and the same for the regulators on the other end.

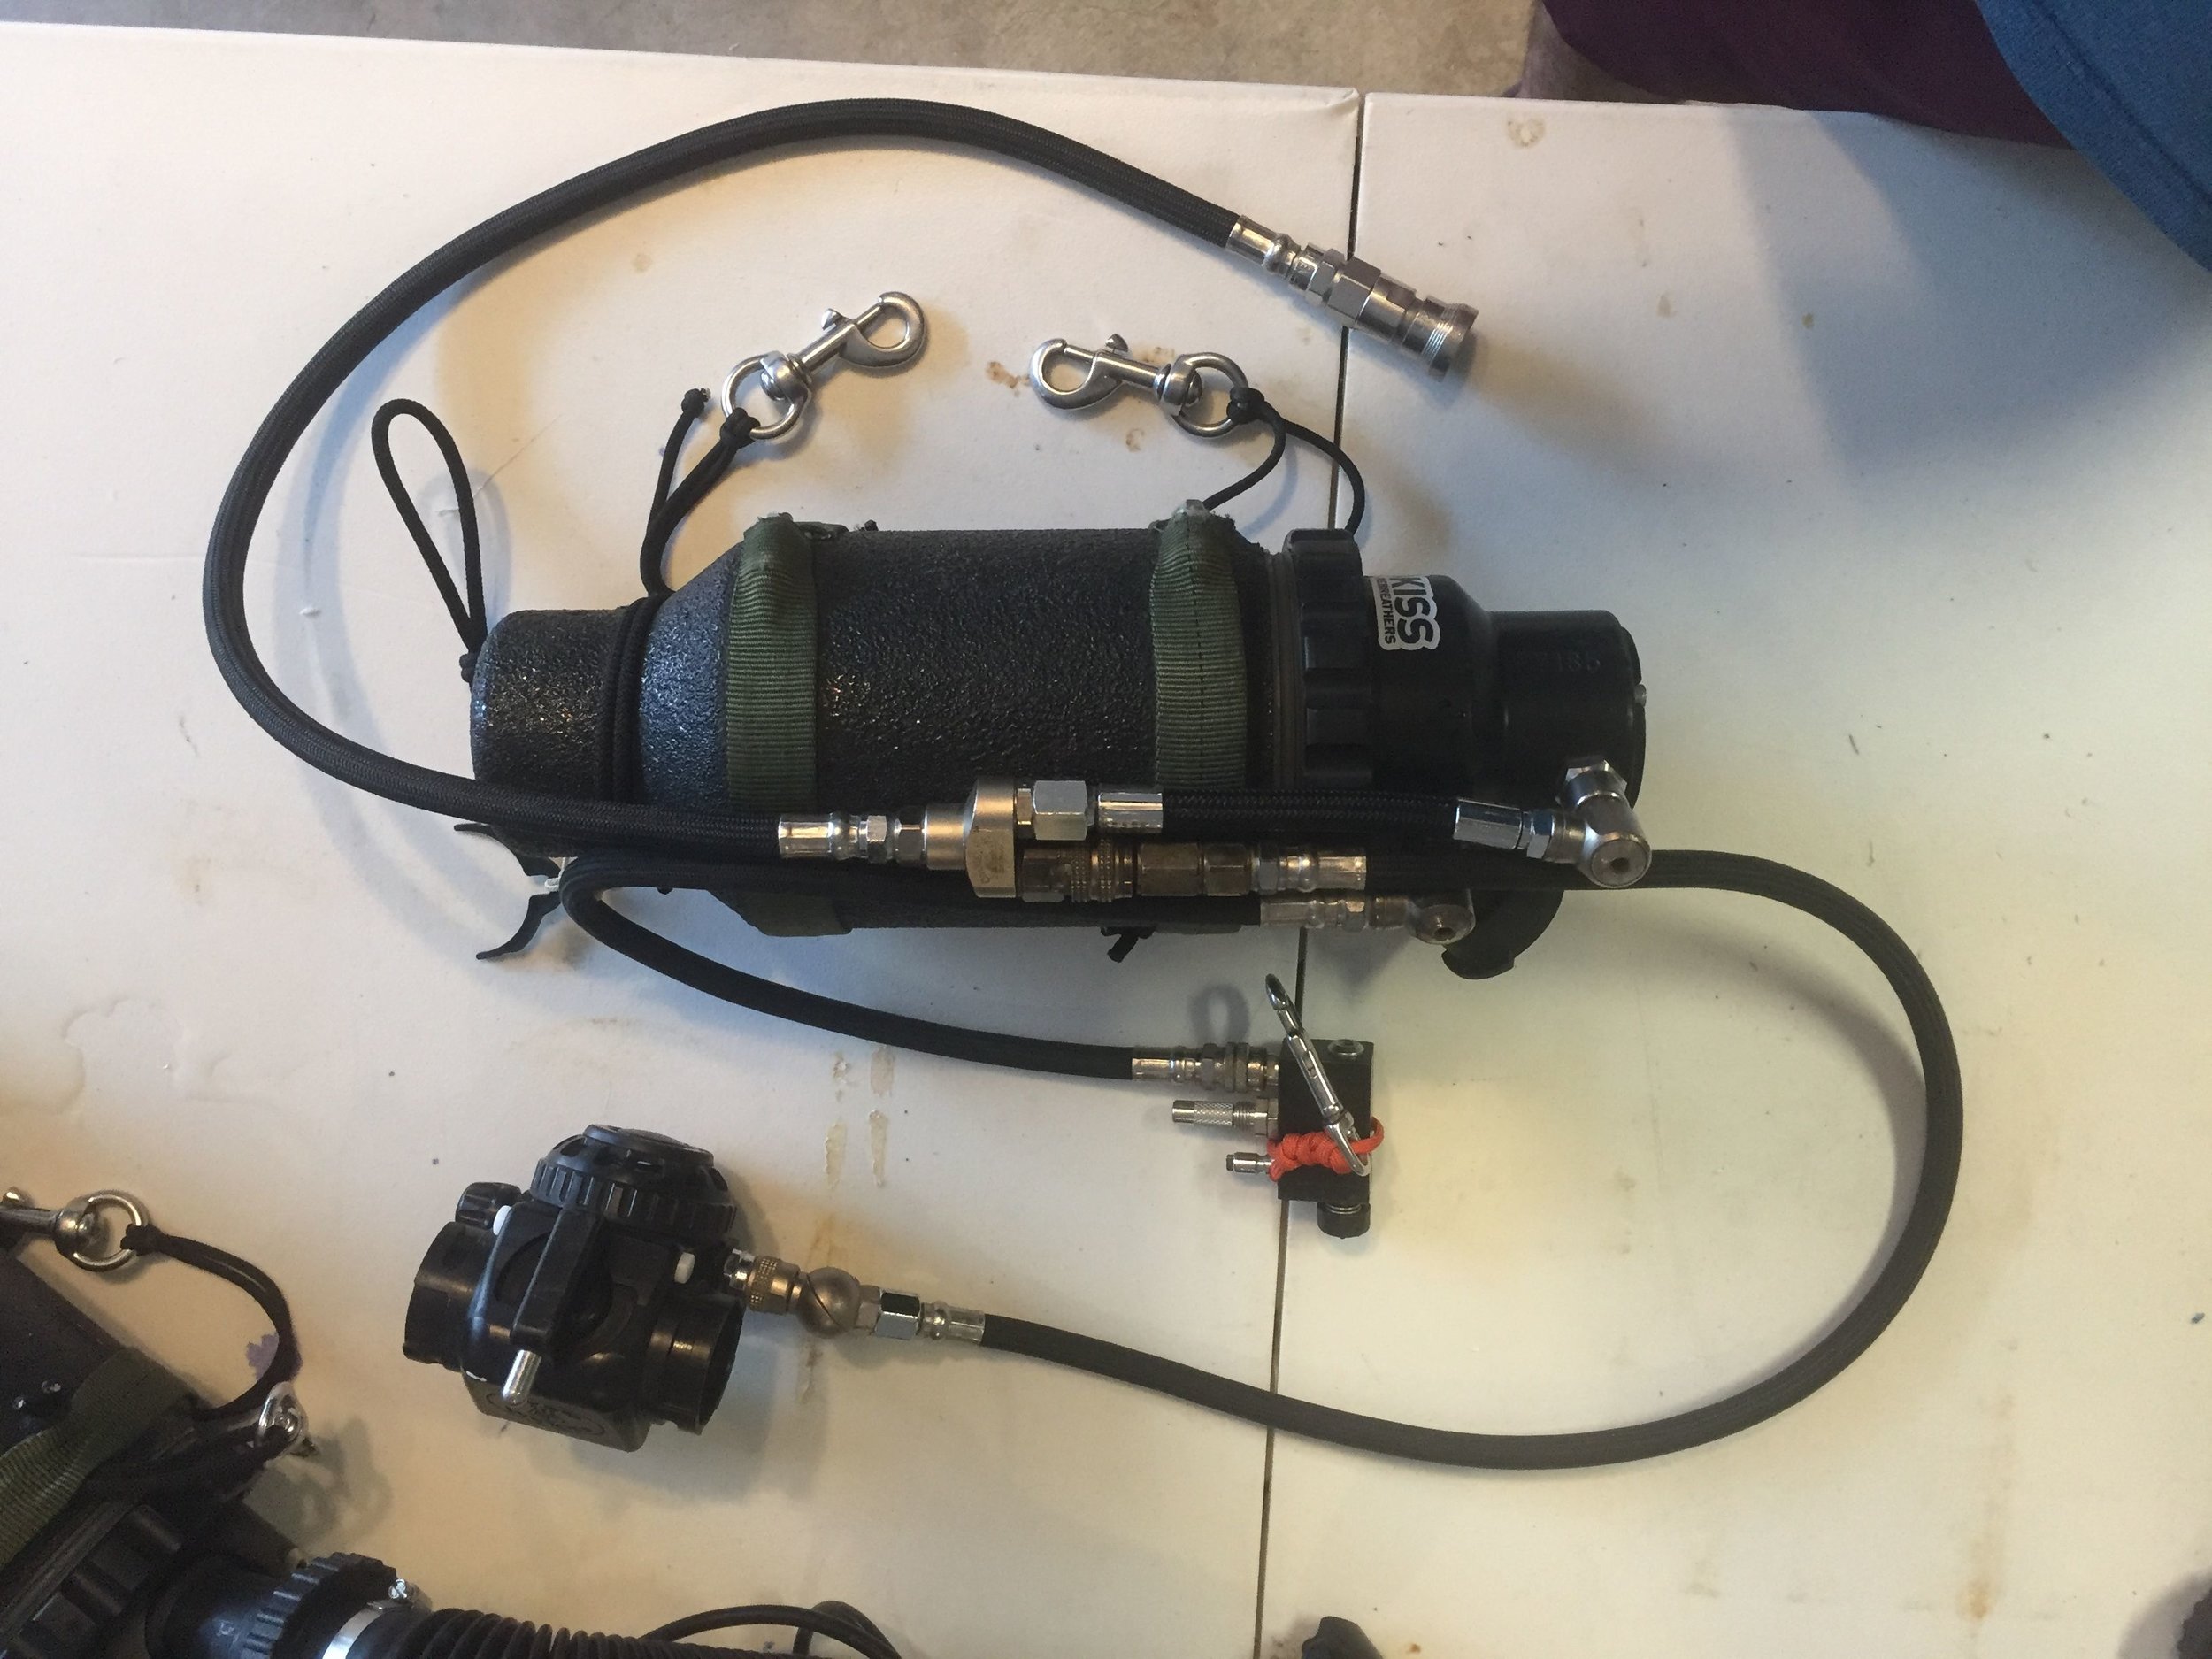
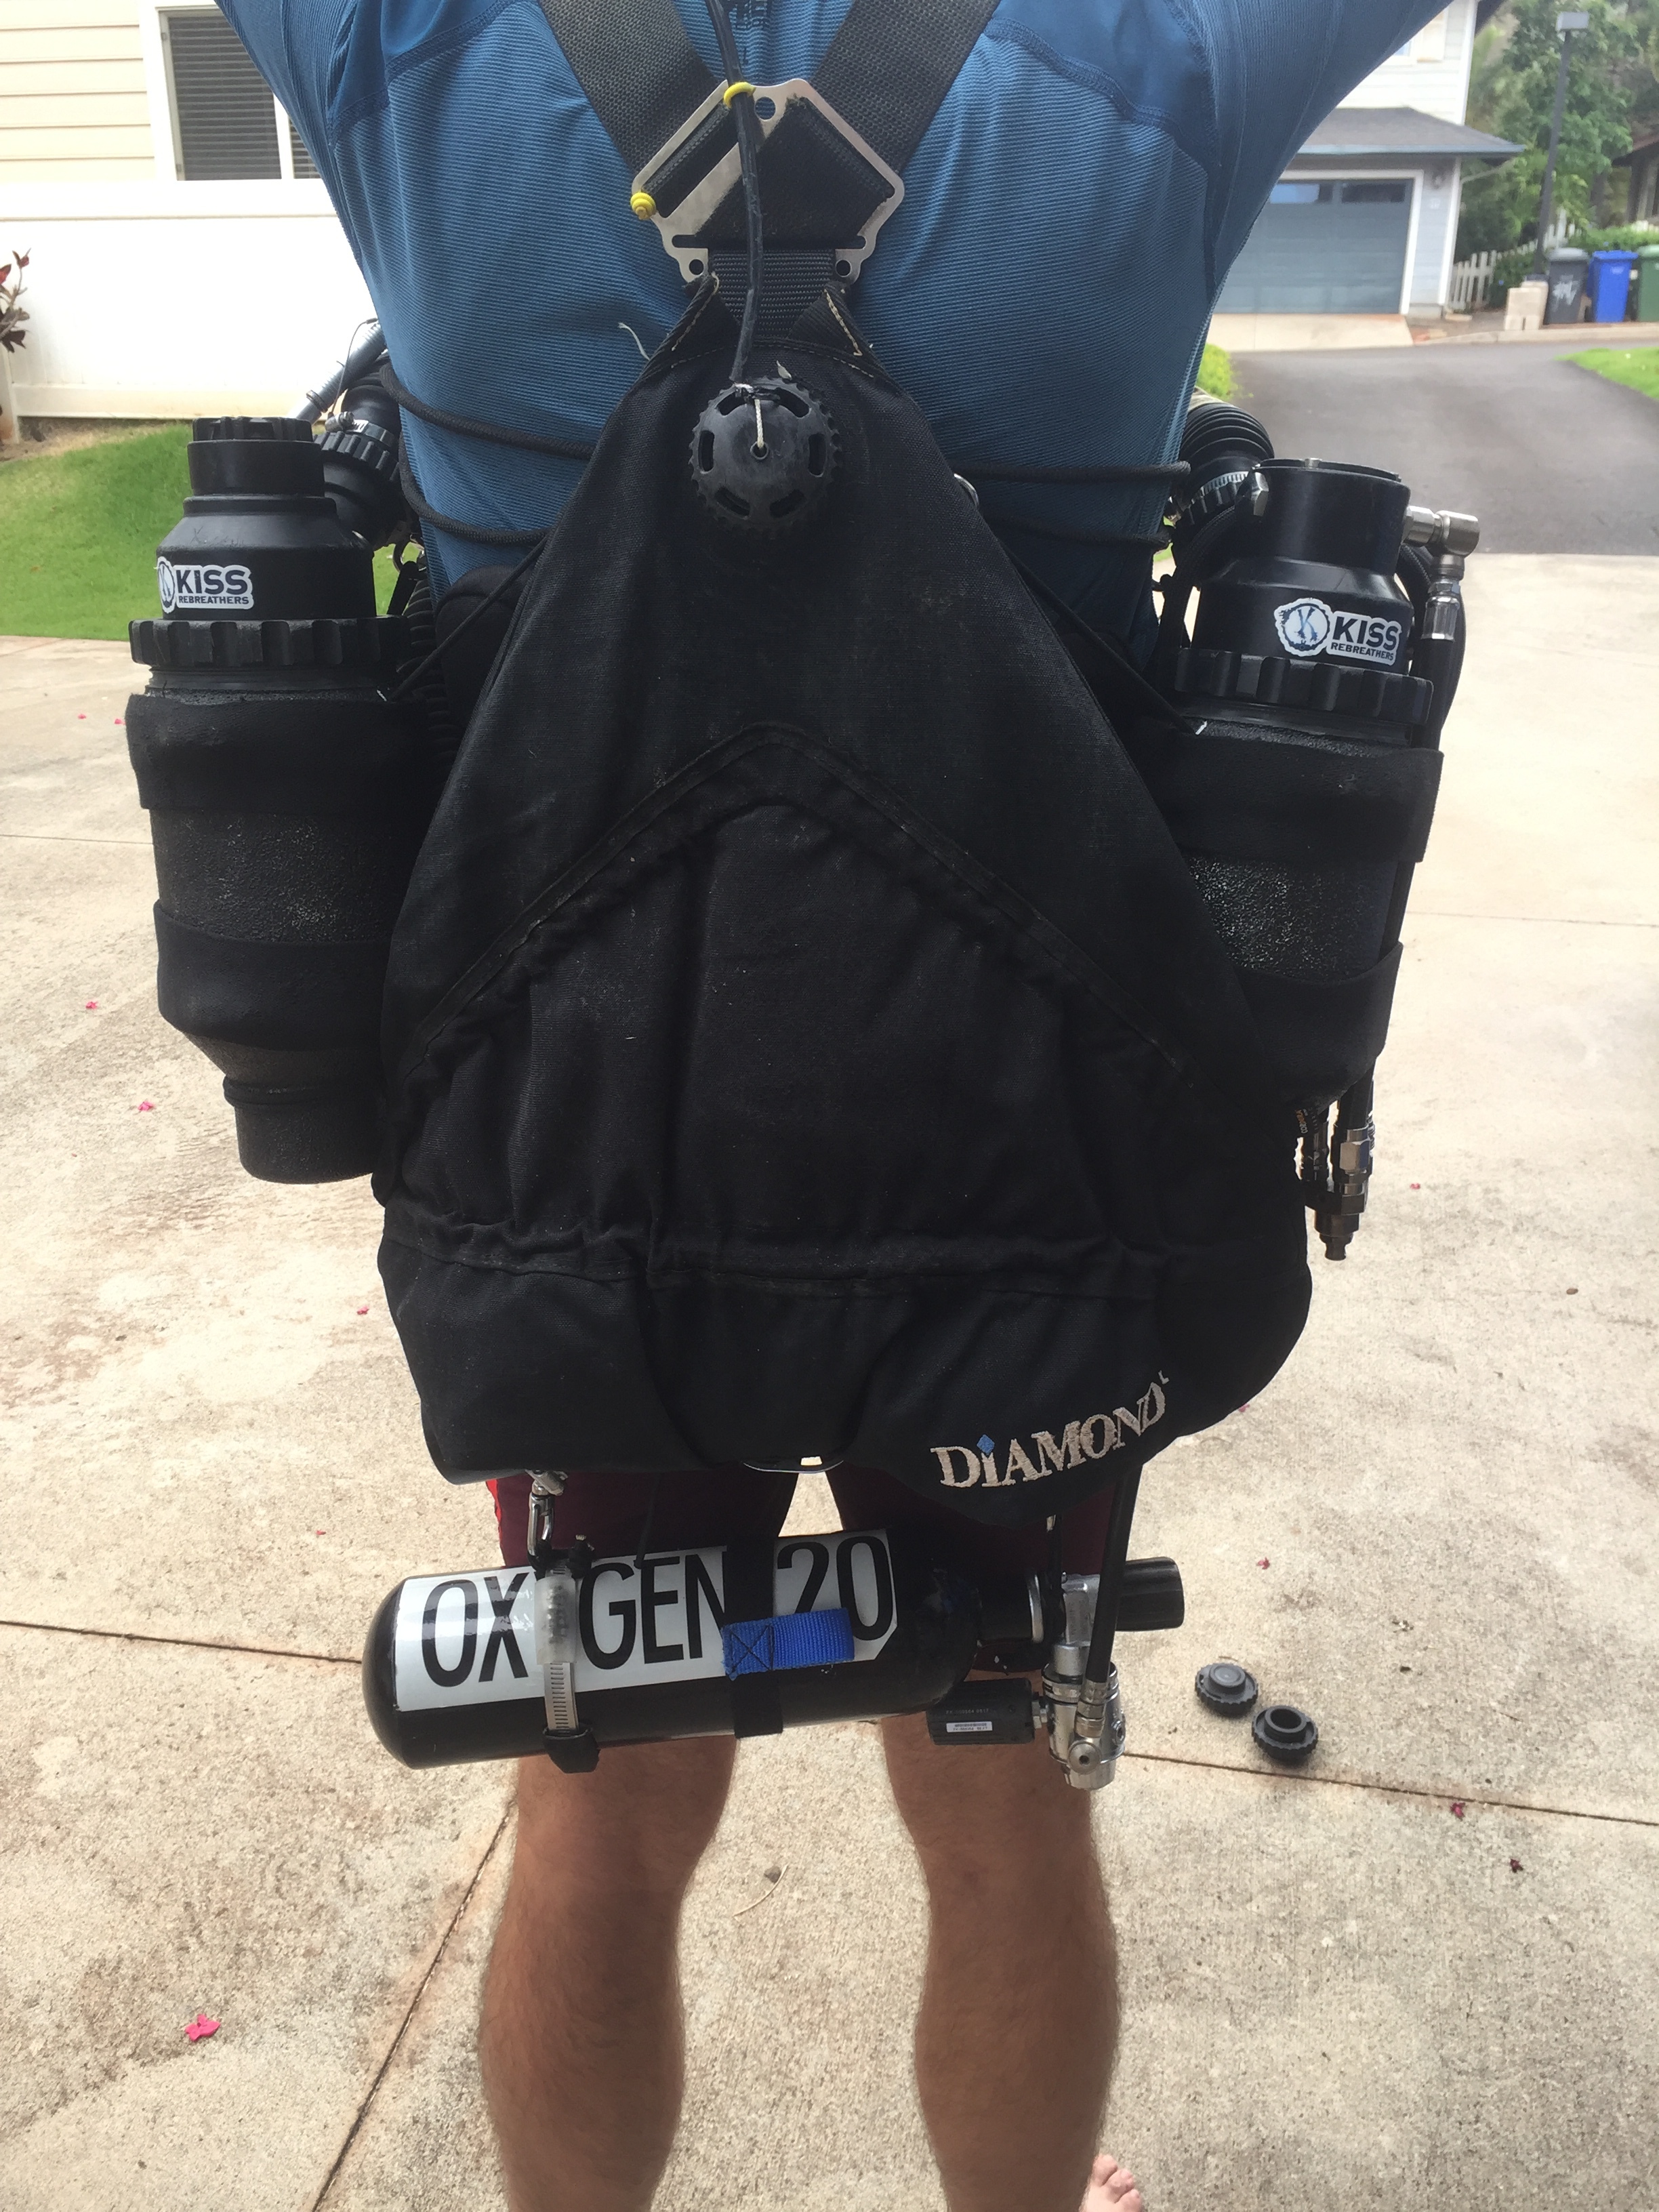
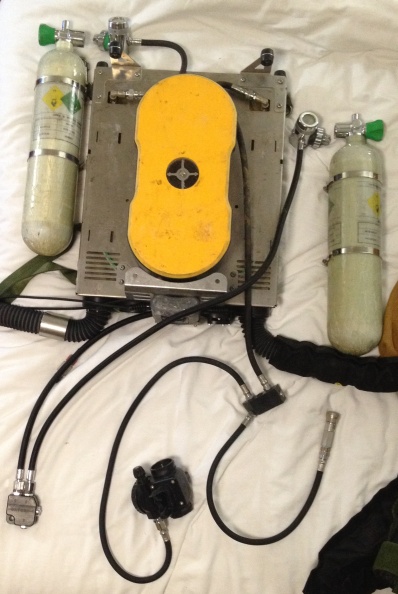
Placement of the tanks and scrubber pre-assembled to the mounting frame.

Here are the bottles and the frame and scrubber packed in the case. The size of the scrubber holds it in place against the foam on the bottom of the case and the top, but its smart to not put large items in the center of the parts panel, as we will see later. Also, typically, I don’t travel with the counterlung connecting tubes installed, as they can by pushed back against the handset connectors and sustain cuts in the hoses. I also always use tank plugs to keep anything from bumping against the tank valves and venting gas.

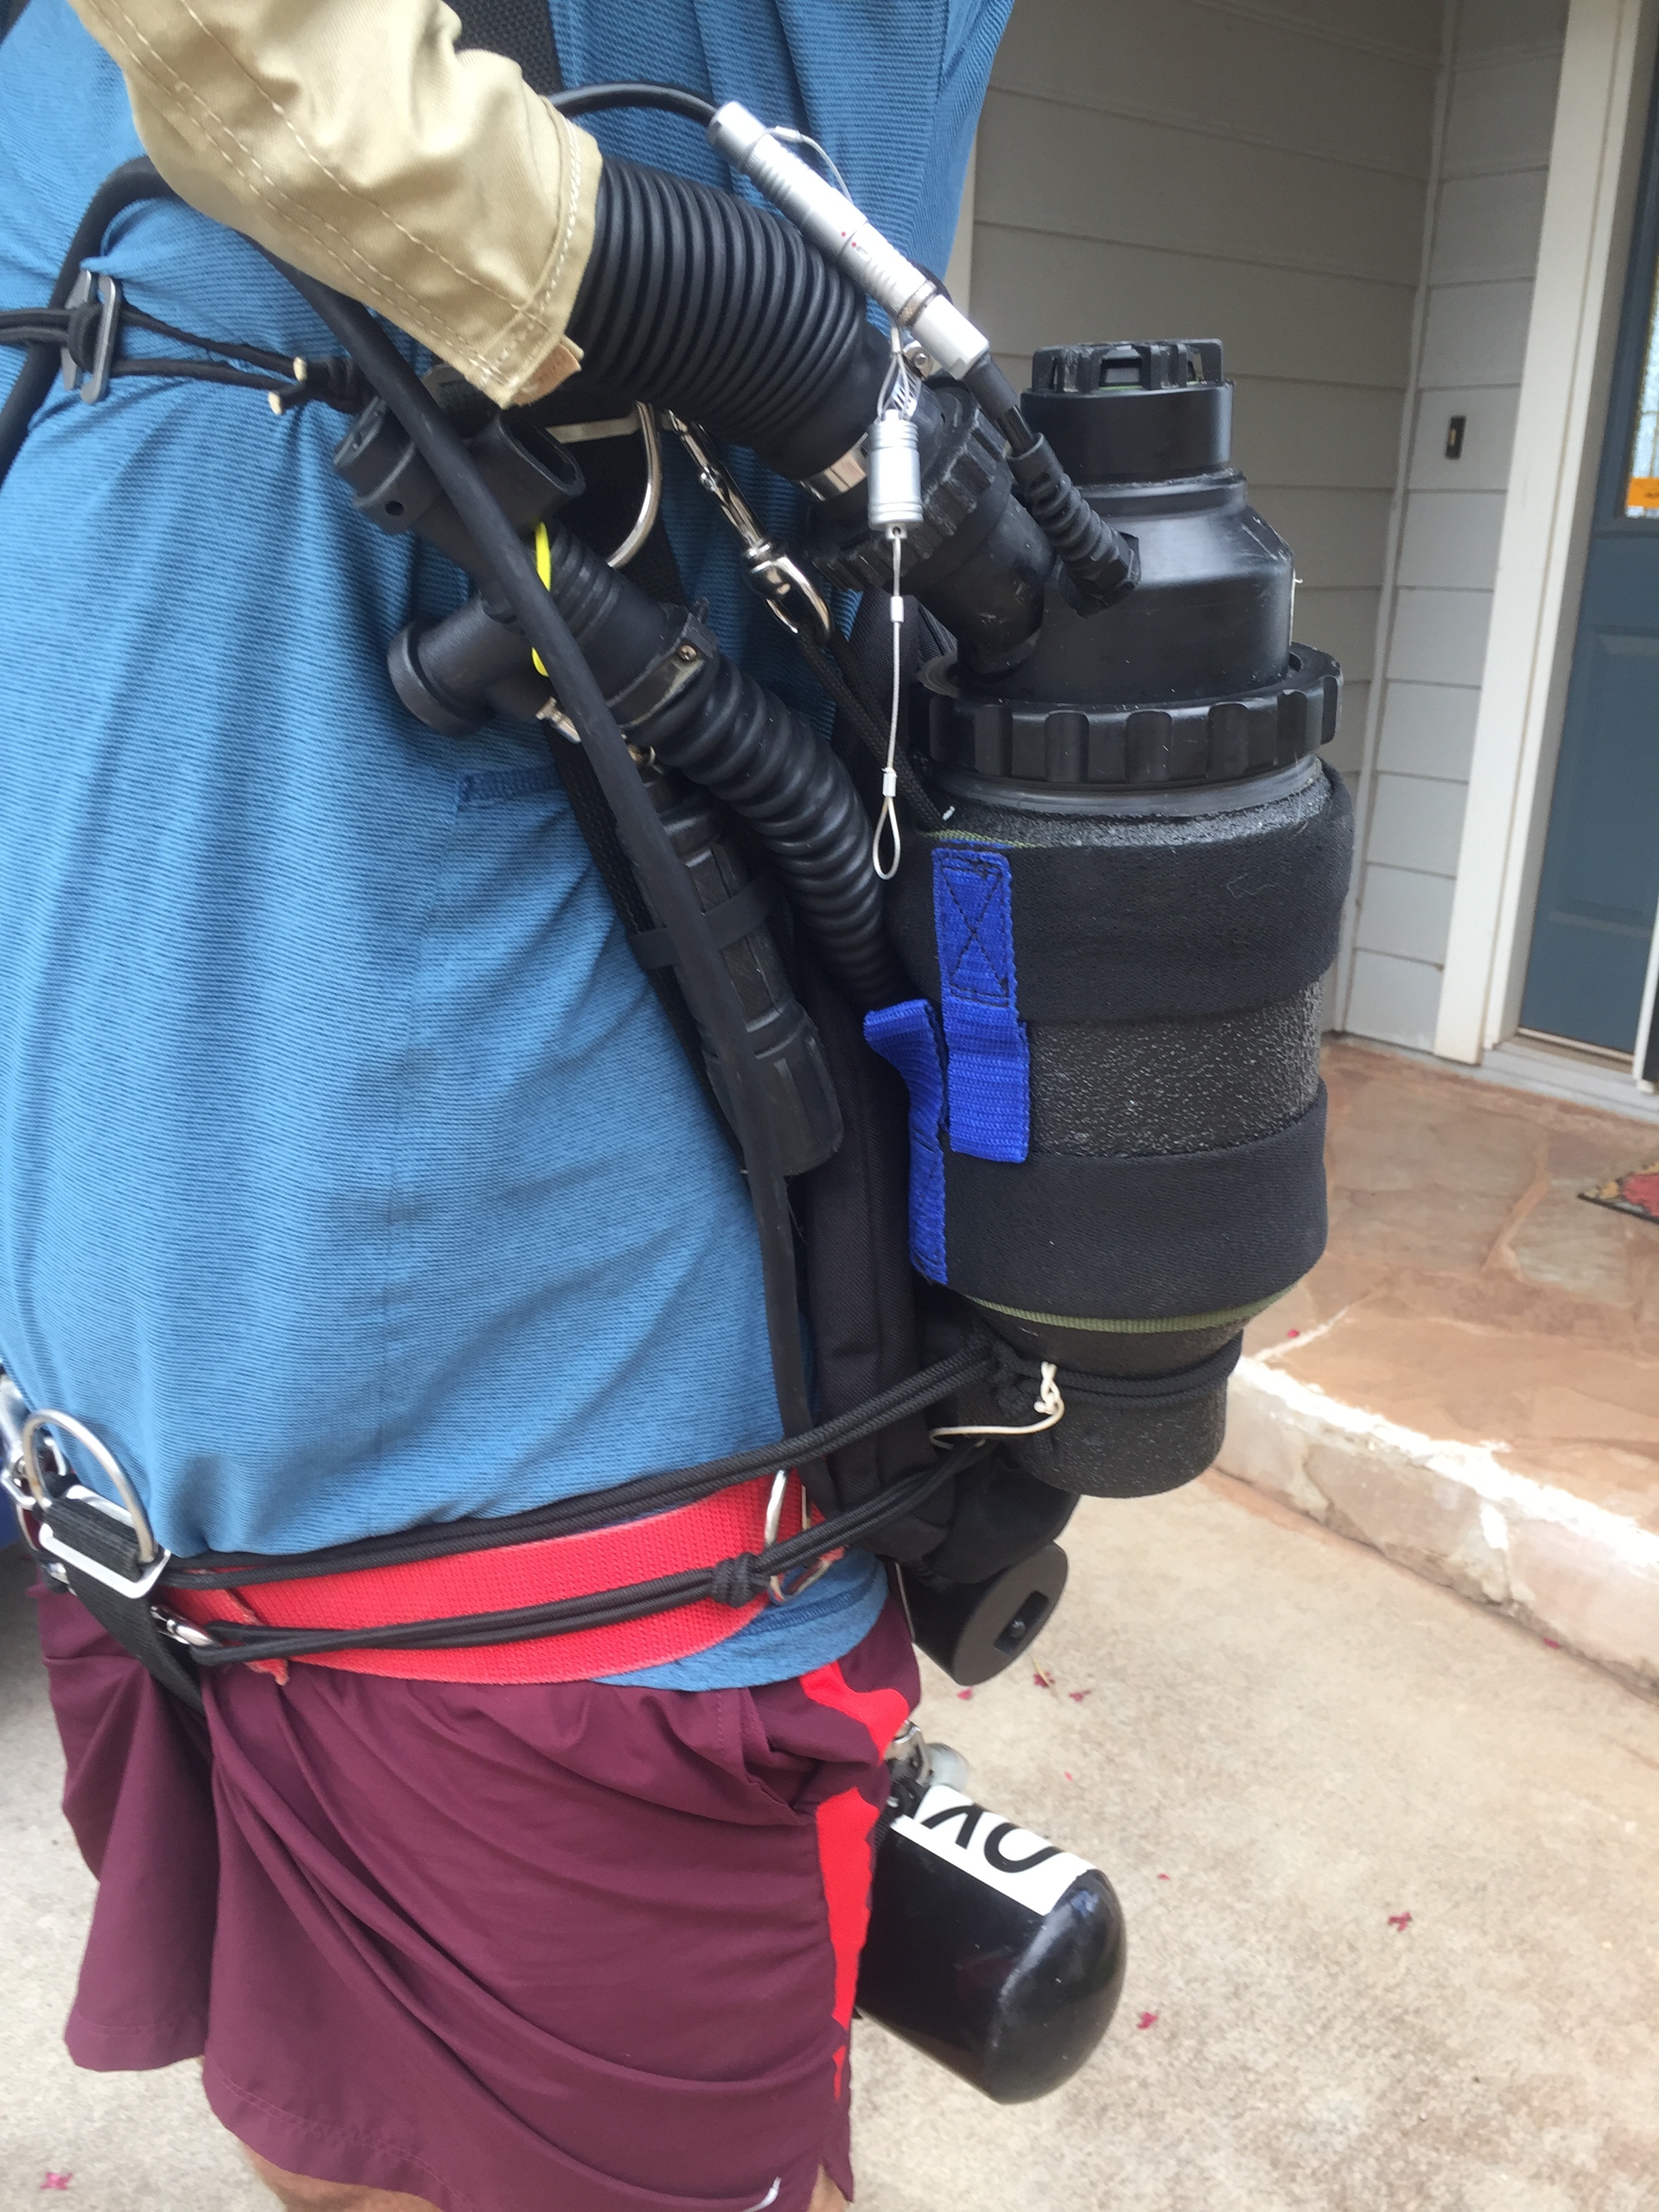
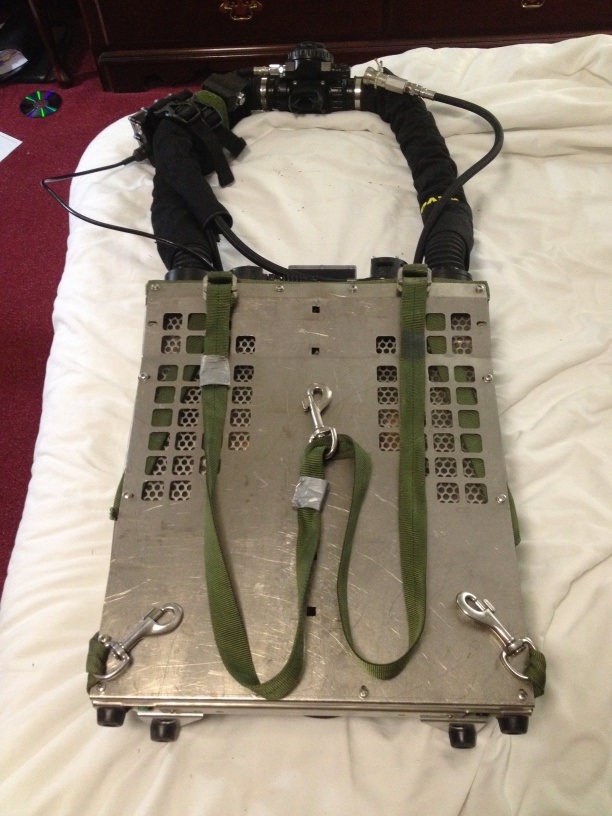
Travel placement of counterlungs and breathing loop

And here we are with the counterlung and breathing loop packed. Everything is ready to go! I recently saw someone making protective covers for the add valves for travel- I would recommend these, as the only time I have knocked an add lever off is during travel, and this would be cheap insurance, for not much weight or cost.

My parts panel hidden away inside the zippered top, which is part of the Pelican Air TRVL package.

And now for the parts panel- As you can see, it zips into the top of the pelican case- It’s important that you order the correct pelican case- not all models have this zipper top. Only the TRVL models will include it. Unfortunately, the TRVL models don’t come with the foam, so you have to purchase that one piece of foam for the bottom later.

The only part that doesn’t come with the liberty is the battery pack on the lower right- which will completely charge the head completely before having to be plugged in. I carry a ready supply of spare parts.

Here is the parts panel with all the stuff laid out. The panel is constructed from heavy polyester mesh (Seattle Fabrics) edged with 1/2” nylon trim and sewn with enough extra space for things to fit underneath. Each pocket has a little overlapping flap on top to keep things inside when the box is tilted. Everything is sewn on to a 500 denier nylon backing, and once complete, the whole thing is sewn onto some 1/4” XCEL closed cell foam so that nothing is crushed against the top. in hindsight, i could have used something slightly stiffer on the backing, or maybe a couple of ersatz battens, as the panel will sag in the middle if the top is up with the zipper fully open, but this is avoided by not completely opening both zipper ends.

A Minimalist Approach (UWS May/June 2005)

This article was originally published in Underwater Speleology in the May/June 2005 issue. I find that more than 15 years later this configuration is still very flexible, even when not used in warm water! Below are the original text and photos from that article.

A Minimalist Approach

Jason Richards NSS 41539

For years, I had been trying to find the bare minimum level of equipment I needed to successfully dive sumps located far back into dry caves. The primary reason was to reduce the workload for the folks who volunteered (or got suckered into) carrying gear back to the water. Concurrently, Mike Tennant and I were cruising the rivers of north florida in borrowed canoes, trying to find every little (and I do mean little) crack that might possibly lead to virgin passage. Often this meant having tanks as small as possible that were easily removable. In addition, we found that during the course of a day on the river, we would don and doff our equipment ten to fifteen times- a tedious and tiring affair with the normal cave equipment- not to mention having to haul the equipment and ourselves in and out of the boat repeatedly. We quickly realized that the equipment needed for both situations would be very similar.

If you haven’t figured this out by looking at the accompanying photographs, this is a side-mount type of diving rig. Though I have never condoned caving for pay, I do suggest that you make friends with some sidemount cavers and learn the ropes in a normal type of sidemount rig before moving into this particular equipment setup. There are some hazards and accompanying procedures that are particular to sidemount caving- many of which the self-taught sidemount caver might not figure out in time to live through the experience. In addition, the size and ease of movement of this configuration may lead a new caver to explore places smaller than they are really prepared for. Always try new configurations in a familiar place- There are almost always small places to try out your new rig in the front of your favorite dive sites.

So- with all of the warnings and such business out of the way, lets start with the equipment. The key to this configuration is that there is no buoyancy compensation device built in. Obviously, this provides some limitations. First and foremost, the type and size of tank that will work are obviously limited. In addition, the type of exposure protection that can be worn will also be affected. There must also be some thought given to environmental considerations. It would probably not be wise to proceed across a gaping abyss of unknown depth to find that you were not quite as buoyant as you thought- nor would it be particularly astute to traverse a low silty passage if there was any question about your ability to keep from making contact with the floor.  A balance must be struck between your personal buoyancy, the amount of exposure protection you wear, the type of tanks that you choose to use, and possibly the amount of weight you may have to add to the equipment. As an example, Mike and I both found that wearing a 7mm full wetsuit provided just enough buoyancy for us to use aluminum 40 tanks. At full inhalation, we were capable of staying neutrally buoyant when the tanks were full. By varying how deeply we inhaled an exhaled, we could stay neutral throughout almost the entire range of gas pressure, becoming slightly positively buoyant for the last 500 pounds of pressure. Of course, depth plays a major part in your buoyancy as well. I found that below 70 feet I was too negative and could not stay off the bottom without constantly moving. But as my tank pressure was reduced, I was able to stay neutral at deeper depths. As another example, Chrissy has found that she can wear 40s and a 3mm full wetsuit and still remain neutrally buoyant to about 60 feet. If you are testing this out for the first time, I would suggest that you try for a balance that makes you neutral at the surface with your lungs partially inflated. This allows you some lung volume to compensate for buoyancy loss due to compression of your wetsuit, but should keep you from becoming overly bouyant at the end of the dive. If you find that you are too positive at the end of your dives, turn your dive earlier, leaving more gas in the tanks, rather than add weight to the rig, which will reduce the depth you can safely go to, and negatively affect your ability to maintain neutral buoyancy with your lungs alone.

Once you remove the wing and drysuit a whole host of equipment may be disposed of. First, all of the inflator hoses should be removed from the first stages. This makes taking the tanks on and off in the water easier, with fewer hoses to deal with. Since there is no bladder, we can get rid of the entire harness assembly. There is no reason to use it as the essential components, the belt and the bungee, will be retained. We are reduced to the two basic items, the weight belt (or in this case, the equipment and tank belt) and the bungee.

The bungee is no more than a loop of 1/8th or 3/16th inch bungee cord. The thicker ¼” bungee seems to be common, but is not recommended- it is too stiff and most people will find that it does not stretch enough to comfortably wrap around the valves. The 1/8th inch may be too thin for some, and it will stretch permanently if used to carry the tanks out of the water. The bungee is tied into a barrel knot. The barrel knot can be adjusted to get a correct length if the loop is tied too large. I would suggest that you use zipties on the adjusting side of the knot if you must separate the two halves of the knot. This will prevent the loop from inadvertently loosening during the dive, or more likely while walking tanks too or from the water. Once the loop has been finished, make a half twist and put one arm through each loop, centering the knot in the middle of the back.

Next is the equipment and tank belt. This is no more than a standard weight belt- trimmed to the correct length with three d-rings and some tire innertube to hold things in place. The two side D-rings, which will eventually hold the tanks and lights, are both low profile type D-rings, available from Dive Rite. They should be placed just behind (or above if you were laying on the ground) the centerline of the body. The single D-ring in the back is a standard size D-ring. All of the equipment carried will be secured from these three D-rings. Low profile D-rings are very important to the in water characteristics of this setup. As with any sidemount setup, it is essential that the tanks be parallel with, and on the same plane as, the centerline of the body. By using a D-ring and mini-carabiner connection, any slack is immediately removed as the tank valve is rotated upwards into the armpit. In contrast, attaching a bolt snap to the tank using a length of line produces at least as much room for movement as the length of the snap, plus any additional length caused by the line. This can be compensated for by moving the side d-rings towards the center of the back, but this makes the snaps even harder to reach to connect or disconnect, and in addition, lessens the amount of room on the belt, useful for storing lights and other items. In the picture at left, Chrissy shows how easy this system is to use, by connecting the tank without even touching the connectors. This does present a metal to metal connection, but without a harness, it is easier to remove the tank by releasing or cutting the weight belt, than it would be to cut any sort of tank strap in such an awkward location.

The only part remaining is the carabiner mounted on the tanks. Because of the extra slack mentioned above, I use reduced size stainless steel carabiners with a keylock gate, rather than a notched gate. The smaller size of the carabiner ensures a snug fit between the body and the tank, and keylock gates allow the carabiner to be removed from the d-ring easily, without the d-ring catching in the notch. The full stainless construction prevents the corrosion commonly seen on aluminum carabiners after long exposures to tannic water.

The biners are attached to the tanks using short length cam bands. The new stainless steel cam bands available from Dive Rite may change your relative buoyancy, so you will need to decide if they will be appropriate for your buoyancy. The bands should be attached to the tank so that the cam mechanism is towards the back, or away from the floor in a normal diving position. This presents a nearly smooth surface on the bottom side of the tank. There is some variation of thought as to the orientation of the valve and first stage, but I have found that with the valves placed outwards and the first stages in my armpit, the valves are much easier to manipulate without painful wrist contortions and the first stages are readily inspectable and protected from impact. It would be extremely difficult to roll off a valve in this configuration- you would have to grind one arm to a nub before the cave would make contact with your tank valve.

A word about lights and other gear. In these pictures you see two SL4 lights. In this setup, one of them is my primary, in its stored position, and the other is a backup. My second backup is a small mask light. For the types of dives that this rig is designed for (short duration, small caves) there is no reason to carry a bulky canister light. Some people have found that smaller 4 AA lights are completely adequate, as well as requiring less room on the equipment belt.  In addition, you should carry a knife of some sort. A typical small sheath knife fits very comfortably tucked underneath one of the tanks. I typically wear mine on my gauge strap, as I hate trying to get the knife back in the sheath on my waist when I am buried in mud, silt or bottom gravel. As for reels, I usually carry a small jump reel and a primary reel- In most small caves, the jump reel is long enough to make the primary tie-off if there is any line at all- leaving me the primary reel (300-400 feet of line) to patch line breaks, continue exploration or whatever.  The last and most important piece of gear is the neck loop. Here you can that C has both of her regulators attached to my neck loop, which is a bit too large for her. The neck loop should be almost snug to your neck. Each regulator has a breakaway bungee with a small bolt snap attached to it. This keeps the second stages out of the silt, and allows for one handed reg changes, should your other hand be busy with the reel or something else.

As you can see, this is a very simple rig to construct, but the real difficulty is in learning to control your buoyancy within the depth and gas limitations without the use of an independent buoyancy control device. You will be amazed at how easy it is to swim this rig- It is almost as easy as freediving. Have fun playing with a new configuration, and as always- please care for the caves.


A note from 15 years in the future. The cam band placement in this configuration is much higher than is used now for sidemount tanks. The reason for this is the high placement of the waist belt. As there is no crotch strap or back strap to fix the vertical positioning of the waist belt, it will be higher than is normally seen on a sidemount harness. The tank cam bands must move up accordingly. This does mean that the tanks may tend to tilt upwards at the end of the dive, but some compromises are made for a diving rig you can hold in one hand. A word on carabiners. Most people will try to use their sidemount clips for this rig, but it won’t work well. The length of the clip, and it’s attachment, will allow too much movement of the tank, necessitating extra d rings or sliding d-rings, or other silly fixes. The carabiners allow the tank to rotate about 30 degrees, and since only 30s or 40s (or smaller) are appropriate, this movement will normally be within the thickness of the diver, and not cause a problem.

KISS Sidewinder and XDeep

SKETCH.jpg

Moving from steel tanks and drysuits to wetsuits and aluminum tanks has forced me to completely change my bouyancy compensation equipment to find optimal trim, and my latest configuration is based around an X-Deep wing and custom harness.

Overview of XDeep wing with harness based on Andrew Goring’s SUMP UK hardware, optimized for the sidewinder.

Overview of XDeep wing with harness based on Andrew Goring’s SUMP UK hardware, optimized for the sidewinder.

It is good to note that we actually have two of these setups, Chrissy used the stock X-Deep harness, but had difficulties getting the sidewinder attached cleanly due to lack of adequately sized holes near the spine, requiring 550 cord loops. She slowly progressed to a harness similar to this.

lower annotated.jpg

Each of these parts is made by Andrew Goring. The two hole triglide (upper arrow) provides a place for the lower sidewinder cannister tie to clip so that it hangs from the lateral center of bouyancy (center of my back.) The shoulder strap/tanks attachment point brackets are one piece assemblies made by Andrew which serve a few purposes. The hole (lower arrow) provides an attachment point for the Oxygen bottle in a sidewinder configuration. It is essential to get the heavy oxygen bottle as far forward as possible to reduce weight required at the shoulders. If the bottle hangs low, laying on the legs, instead of up close to the butt cheeks, the longitudinal center of gravity shifts aft, and significant weight must be added at the shoulders to counter it. By clipping the tank close using these higher holes nearly at the waist belt, the tank is kept as far foward as possible, and lays against the back of the wing when inflated. Chrissy and I have also found that the stock X-Deep lower bracket brings the shoulder straps uncomfortably close together at the lower back, imparting a strange twist in the webbing. By using these brackets, the harness changes to an H configuration, and the straps carry the weight of the tanks directly when forced to stand with them attached, such as on a dive boat. (The horror.)

upper annotated.jpg

Here, the upper connection area. The type of shoulder strap connector here is irrelevant, however the double hole triglide here is critical, as is the placement. One of these could be placed with the standard X-Deep upper bracket. The upper holes should be used to mount your tank bungee. The lower holes provide a connection point for the upper tie of the sidewinder cannister. Placement of this is important- the bungees should run parallel to the ground (when standing, or perpendicular when swimming) just below/behind the armpit, so that the bungee does not impart a loading on the tank, more importantly, the upper sidewinder connection should be as high as possible to prevent pinching of the rather substantial wing, which results in a bubble wing shape, instead of a smooth low profile.

IMG_0266.JPG

The underarm configuration. This is actually the lower of two d-rings- the upper is located at the collar bone, for proper below body stage management. Here, Another Andrew Goring custom part, a triglide with two loops- the interior provides a mostly unnecessary (for me) chest strap attachment. Women with large chests who have difficulties with the shoulder straps rolling out from the center of the body will need the chest strap arrangement. The outer loop provides a connection point for my bungee and also the bungee retention on the top of the sidewinder cannisters. The backup lights are tucked below the edge of the wing, out of the way. Though I was not originally a fan of the inflator across the chest, I am growing into it, and having it attached up near the shoulder is difficult with the sidewinder.

IMG_0270.JPG

Configuration of the sidewinder canisters. The lengths of the center straps (550 cord, in this picture) and the length of the retention bungee are very important, and must be sized to each individual, and may even change between wetsuit and drysuit. It is important that when clipped to the harness and lying prone, that the sidewinder cannisters lay parallel to the floor. If the straps are too short, the tops of the cans will stick up above your back and hit everything above you. If the straps are too long, they will lay on your tanks and stick out away from the body,

CA125338-045D-48EA-9355-14178FED3988.jpeg

The picture above shows the counterlung and canisters installed, minus the actual breathing loop. The counterlung sits between your back and the center back strap, but outside of the lower shoulder strap connection points. The wing tips are pulled up from behind in this view, between the counterlung and the canisters.

749C915B-4D34-495B-9424-6872A459F79E.jpeg

Here, the upper canister connections are shown.

72F37CC7-3DE6-468B-BA4A-2A0C98DD102C.jpeg

Here, the lower canister connection. Notice that these will not end up between the harness and body, but on the outside of the harness.

524263BC-1E0C-4B61-B485-98DEEA547181.jpeg

In this picture of the left side as worn, you can see the bungee attaches to the outer loop of the chest strap/backup light D-ring. The wing is pulled underneath the canister and attached at with a double-ender to the other side, the inflator pulls with the wing under the canister, and my hoses are routed under the arm.

99ED691D-4EA4-456F-BE45-2A8556D12450.jpeg

On the right side (as worn) my oxygen addition block is shown, tight to my shoulder strap, with the button oriented towards the center of the chest, and my offboard diluent feedline, which can feed from anywhere with a QC-6.

1C656C33-26A0-4004-942D-EE4ABE3BF763.jpeg

Finally, the view from the back. Hope this helps, and sorry to everyone who have waited a year or more for me to post this.

E0E63C48-B69D-4F17-AE41-88D991B5D16D.jpeg

Rigging a KISS Sidewinder with BOV

Hello again, some folks are asking about rigging a KISS sidewinder to work with a Golem BOV.

IMG_0936.JPG

The primary problem is that adding a low pressure gas requirement means you have to split your diluent feed from the ADV and manual diluent addition (if you have one, I do not), or possibly just your manual addition, if you have purchased an ADV deleted head. There are a few different combinations.

To explain my setup, i use the standard ADV. I do -not- have a manual diluent addition. My reasoning behind this is that without an ADV, you cannot use the rebreather as a BOB, and I prefer my unit to add gas as required, rather than me having to finger it in via manual addition. There are some downsides. The ADV is prone to filling with sand in very small places, or when dragged through sumps. This is relatively uncommon, and can be mitigated by changing the ADV fixing bolts to a non-tool requiring solution. Most people will never need to do this. Aside from this, I find that in normal use, I never need to manually add diluent beyond what can be accomplished with a double exhale and flushing the loop or forcing addition through low loop volume.

Enough talk, on to the parts.

Overview of all the parts.

Overview of all the parts.

To make the most streamlined setup, the first step is adding Omniswivel pivot-swivels to the head, so that nothing sticks out towards the body. This also makes the cannister much easier to travel with.

The swivels are identical: Omniswivel Low Pressure Pivot Swivel with 1/4 inch extensions. Part Number: PS-LP-3. The 1/4” extension allows the knurled locking ring to rotate beneath the hoses without having to remove or rotate the swivels.

Clipboard02.jpg

Working from right to left, the ADV pivot swivel is attached to a 6 inch Miflex2 Extreme LP hose. This screws into an Omniswivel 3/8” Male to 9/16” female adapter. (OSI-SZM-YM.) the adapter is screwed into the upper port of an Omniswivel low pressure Y block (OSI-MBZ-2.) The Y block comes with different adaptors for the hole on the single port side- the threads are 3/8” Male. I feed my QC6 line into here, so required a 9/16” male to 3/8” Female adapter (OSI-SZF-YM.) The lower port of the Y block gets a quick detach. I prefer my QD here instead of at the second stage, as having a QD at the second stage adds a lot of weight in front of the face, and reduces flexibility of that hose area. In addition, I do not do gas switches at the BOV- that happens at the rebreather QC6. The QD is an odd one, a QDZM-CVZF-S which has a 3/8” male on the female QD side, and a 3/8” female on the male QD side. This allows the BOV to be easily disconnected from the cannister for transport and cleaning without tools.

As for hose lengths, I’ve found the 25” Miflex is just about right for under the shoulder routing, though an even shorter one might be appropriate if you are running your hoses over your back. I use a 29” Miflex for my QC6 connection. This is a little long, but makes for easy connections, and adds a little extra length for when I have to connect across my body to a stage or deco bottle.

A note on Miflex hoses. If the braided hose you got does not have miflex engraved on the fitting, or it did not come directly out of a miflex branded bag, be wary. In my experience the non miflex braided hoses have a very bad track record, and they are sometimes difficult to tell apart. If you purchase them at a shop, they should come in the miflex branded bag, or it is probably a knockoff. The same goes for swivels and hard parts. The aftermarket swivels are very low quality. Purchase omni-swivel parts, and service them regularly, and you will never have problems.

KISS Sidewinder: Hoses under the arms and rigging options

A few folks have noticed that I wear my KISS Sidewinder with the hoses routed under my arms. There are a couple of reasons for this, first and foremost, it prevents the hoses from rubbing on the cave ceiling while squeezing through very low bits. Secondly, it makes gearing up more comfortable for me, the loop is always easily in reach. In addition, it leaves my shoulders open for mounting a second rebreather with its own loop hoses. Below are some pictures of how I set mine up, mounted onto my light harness and triangular wing.

Surveying in Giant Cave, Belize on the sidewinder. Hoses routed under the shoulder.

Surveying in Giant Cave, Belize on the sidewinder. Hoses routed under the shoulder.

If you have set your Sidewinder up with Edd at Cave Adventurers, or Mike Young, there isn't much to do to move the hoses to the front, but if you want to streamline your diluent or oxygen hoses, that is a different matter altogether. I won't get into that here.

IMG_0640.JPG

The basic setup, looking at it from the back, which shows my connection points, and not much else. You can see that I have a single offboard QC6 which feeds diluent, my low profile oxygen setup (see the writeup on changes with that here.)  I will note that I have since switched to the smaller counterlung, as it more closely matches my lung volume, and is not as easily overinflated.

The diamond wing with basic harness and Andrew Goring's hardware.

The diamond wing with basic harness and Andrew Goring's hardware.

After my last dive rite harness completely exploded (after 15 years of very hard use, no shade on Dive Rite) I decided to try something different. I wanted something that would not require sewing in the field when it fell apart or ripped. I decided on a triangular wing and a web harness. The most important part are the mounting brackets on the spine strap. You can see them with two holes on either side along the center strap.

The small counterlung with the wing and harness.

The small counterlung with the wing and harness.

I found that the larger counterlung created a bubble under the top of the wing, lifting the wing up. No matter how low profile the wing was, this created a hump-back situation. The smaller counterlung fits lower on my back allowing the wing to be secured to the center strap preventing as much of a hump. Another sidewinder diver using a Dive Rite LTZ brings his counterlung and cans even lower, running the waist strap above the counterlung ports. (He is also about 5'8" tall.)

Harness with cans, no counterlung to show connection points.

Harness with cans, no counterlung to show connection points.

The cans connect via 550 cord loops to the plates along the center spine, between the wing and the body. This keeps all the snag points underneath the wing and away from damage. The standard KISS plate and attachments could easily be used here, just add grommets to the spine strap. I decided against the stock plate, as I am always looking to reduce equipment to be carried. Notice that the hose towers are now facing upwards, ready for forward facing loop hoses.

Loop Hoses installed.

Loop Hoses installed.

I will finish off with a gallery of me wearing the rebreather out of the water, which shows how the cans sit on my body, and how the various parts interact with the harness. I will also note that with tanks, no rebreather and jetfins, this rig is longitudinally neutral. Adding the rebreather with the large counterlung and no oxygen bottle, the center of gravity shifts to the feet requiring about 4 pounds in the shoulder area. With the smaller counterlung, this is reduced to less than two pounds. Remember, this is without light cannister or oxygen bottle. Adding the oxygen bottle and 15 Ah battery cannister shifts the CG even further to the feet. With a 2mm wetsuit and jetfins I was requiring 11 pounds near the shoulders to counterbalance the large counterlung, oxygen bottle and battery can. With a CF200 drysuit, I can correct enough with the drysuit that I only need about 6 pounds on the shoulders, but the oxygen bottle is still an issue I want to correct. And yes, my wing pull dump needs fixing. ;)

Stowing the loop will kitting up is easy- it hooks behind the neck. No more flapping about trying to find the loop floating behind you.

Stowing the loop will kitting up is easy- it hooks behind the neck. No more flapping about trying to find the loop floating behind you.

Sidewinder: a smaller O2 Valve and Regulator

Never happy to remain with the factory option, (or according to Chrissy: "Why does everything you own look like you built it in the garage?) I have been piddling with finding the optimal Oxygen valve and regulator setup for the KISS sidewinder.

The factory setup is a standard left handed valve and high quality first stage with fixed intermediate pressure. Weight: 2 pounds and 10 ounces.

The factory setup is a standard left handed valve and high quality first stage with fixed intermediate pressure. Weight: 2 pounds and 10 ounces.

I have a few problems with the factory setup that are particular to my usage- it sticks up a little too high for my tastes (actually catches on things in small spaces laying on my legs); It is too heavy on one end, requiring a counterweight on the opposite shoulder, and I don't want a fixed intermediate pressure regulator, as I am using an adjustable needle valve.

The H2Odyssey valve/regulator combo, courtesy of Mike Young.

The H2Odyssey valve/regulator combo, courtesy of Mike Young.

My first stop was to try out one of the slick H2Odyssey valve and first stage combos, which weighed in at almost a pound less than the standard setup. It didn't completely eliminate the need for a counterweight, but reduced the size of it significantly. It took a few weeks, but the first problem stood out immediately- the fill port. This thing fills like a spare air- in that it requires an adapter. And the adapter is no magical piece of machining. It leaks frequently, and the drain sleeve is difficult to close tight enough to prevent leaks. Probably the most troublesome part of the fill process is the existence of a one-way valve in the fill port. It is so tight that the pressure must rise about 300 PSI higher than your final pressure for it to open. Very problematic when filling with a booster, trying to get to 3000 PSI. Frequently the booster hit 3300-3500 each stroke to settle at 2900 in the bottle. Once in the water, it worked fairly well, the low profile was quite nice, right until the bottle valve required manipulating. when pressurized, the little red cross became difficult to turn. The small size and low clearance was difficult with bare hands behind your back, and would have been nearly impossible with gloves in cold water.

DUI suit bottle valve and Poseidon first stage.

DUI suit bottle valve and Poseidon first stage.

For the next iteration I got ideas from several people, but Kyle Moschell (KUR) put me on to this beautiful DUI top handled valve, a design I had been looking for for many years for other uses, and I had no idea existed. I bought a couple of them. The 1st stage is a hand me down from my Canadian friend and sump diver Peter Norris. The standard valve weighs in at 1 lb, 6 oz, and the DUI valve weighs in at 1 lb, 4 3/8 ounces, so the weight loss is split between the smaller valve and the smaller first stage. At first, it looks a little awkward, but the valves are ultimately the same length, from the top of the bottle to the furthest point from the bottle. 

IMG_3777.JPG

In this picture, the black tank setup is upside down, the regulator rides on the low side of the tank ideally, hanging off the edge of your leg, as shown on Edd Sorrensen, below:

Edd with his sidewinder, courtesy of the KISS website.

Edd with his sidewinder, courtesy of the KISS website.

This works pretty well, but puts the O2 valve in an awkward position for manipulation, as it is a difficult reach far behind you with the scrubber canisters directly behind your arms and the handle pointed away from you. This causes many to add an inline shutoff valve on the oxygen line instead of trying to reach the valve. The DUI valve makes the knob much easier to reach, as your hand falls to it naturally, about where your aft tank connection point is located. It does not stick far enough out to be rubbed closed from any direction, save in a situation where you might have the right tank removed. From this vantage point you can see that the entire valve and regulator (even with swivel) are lower profile than the thickness of the bottle when worn in this configuration. 

IMG_3778.JPG

Another view shows that the DUI valve could be arranged without the low pressure swivel in the same fashion as the factory setup, and the valve would still be much easier to reach, however I prefer the lower profile setup as shown. On a side note, I'm not a complete fan of the digital sender, I find the information it provides pretty much what I would expect at the end of the dive, though on longer dives, it is nice to have some warning of when an O2 source switch is coming due, as this rebreather does not have on board redundant oxygen. 

That's it for this installment of This old Rebreather, stay tuned for more fiddling and bad ideas!

Rigging a REVO for dual oxygen and offboard diluent

Rigging a REVO for dual oxygen.

A friend of mine who is buying a rEVO asked me how I rigged mine for my 28,000 foot (round trip) dives in Tennessee using dual onboard oxygen and my standard sidemount rig as bailout, keeping the rig removable in the water for small restrictions. Thought some of you might find it interesting.
revo-dualox.jpg

Both bottles are oxygen. The left (as viewed, not as worn) bottle is the fixed IMP 1st stage, and is plumbed as from the factory, directly to the button mechanism below it. You can manually add from this bottle using the button at the bottom of the rig, if you absolutely had to (multiple failures on the other side) but it's primary purpose is to drive the orifice. The bottle on the right (as viewed, not as worn) is a depth compensated 1st stage, and has only one line out of it, which goes to the Golem oxygen manual addition button strapped to the breathing loop. (See picture later.) The other line from the Golem button goes into the machine at the little port near the dump valve. The sole purpose of this bottle is to provide make up gas, compensating for a low orifice setpoint. Failure of this bottle means you will have to add oxygen from the bottle feeding the orifice, and will effectively halve your available oxygen time, and may not work at all down deep. The little black block with three hoses sticking out of it is the Diluent manifold. Mine sort of sucks, because it doesn't flow gas as easily as it should (poor machining, and wrong material) But it also rocks because it fits directly behind the front grate thing and because of the weird angle I machined the input face, the feed line sticks out directly in the right place, i.e. over your shoulder without a bend. The line with the QC6 is the feed line- it goes to a matching connector on either one of your sidemount bottles. One of the lines off the manifold goes to the BOV, and the other goes back to the factory connector for diluent. This allows you to manually add diluent via the bottom of the breather (never, ever had to do this) or you could manage it via the BOV (also never had to do this.) Actually, I cant think of a reason you would have to flush with DIL, that you couldn't manage with the ADV, which is of course, fed from this same factory connector.

Some things to think about: As you get deeper than the setting on your fixed IMP reg, the orifice quits pushing gas. It gets pretty obvious, the O2 levels start dropping faster than they were before. Not much faster, but I notice it. Because of this, a solenoid should be fed from the other (non-compensated) bottle. Not sure how those are plumbed, as I don't have one, but it might be difficult to move it over to the other side. This would help with some double redundancy, but making it possible to get oxygen out of both bottles in multiple ways. Any more than that, and why have bailout?

I have found that I occasionally need one additional line on the non-compensated reg. This is for creating an "oxygen short circuit" when I am pushing the rebreather and not on the loop at depth. It is a short 8" hose that is stowed on the left (as viewed) side that can be plugged into the diluent feed line- so that when I have the machine stowed for pushing (breathing hoses all curled up and stowed) it wont collapse the counterlung because it can compensate by itself by adding O2 to fill the volume. Of course that fucks the whole loop mix up, but you just dump it when you get back on the loop, and no issues. I suppose I could leave it plugged into a sidemount bottle, but I have found that I can strap it over my legs from the back hooks and scooter or swim with it in obscenely low shit. You will likely not ever need this capability.

So, failure analysis, of sorts- Anything on the fixed IMP side quits, you turn the dive, and manual add from the compensated IMP side. Anything on the compensated side quits, manual add from the fixed-IMP side via the bottom button. Pretty easy. The only issue is running out of oxygen. I'm finding that 8 hours puts me at about 1300-1500 PSI left in these little 2L CF bottles. I suppose I could get 12 hours and they would be dead empty, but then I would have to be on the big scrubbers anyway, and odds are most of that would be deco on another machine anyway, so that's hardly an issue. Even Jasper and Cow Crap were only running 5-6 hours max for 28,000 feet round trip, so at the moment, it's a non-issue. Luckily for me, they seem to use up at almost exactly the same rate. Pure luck, I'm sure.

Once concern is the diluent feed. At the moment, there is only one. If the QC6 were to shit up, I would have a problem, and they are pretty complex little devices, and frankly, I'm amazed I haven't had one die on me yet. They should have some TBO or time between mean failures, but I've never heard of someone actually having one fail in freshwater. There are some options, one being switching the BOV connector to a Q.D. type, then having one sidemount bottle with a QC6 and one with the Q.D. connector, but the Q.D. aren't DESO (double ended shut off) so you have to turn off the tank to connect/disconnect it, and then you will end up putting a little water in your system, but you could flush most of that that real easily by purging your BOV, so that is probably a minor issue. I guess that is a pretty half ass reason for not doing it, so maybe I will change that, plus, it allows for some interoperability for those tools who use the Q.D. connectors on everything.

Here is a pic of the Oxygen addition button in dive position. It stays here all the time- it's in front, not on my chest, and I don't notice it.

revo_o2_add.jpg

Here is a pic of the diluent manifold, in it's proper place. If I was cool, I would have a couple of stainless steel machine screws attaching
it to the grid, but I don't care that much, and it isn't going anywhere. Geez, my bottles are taking a beating.

revo_manifold.jpg

And here it is in dive mode. The dil feed line actually has a small loop of bungee on the right (as viewed) hose right next to the BOV
for storage when donning/doffing the rebreather or when is being pushed around. No loose hoses, no loose pressure gauges. The only thing
I would change now is swapping the HUD and Shearwater handset for a single hardwired NERD. I Will be testing yours out when it shows up.
That replacement would remove the last loose wire (the one leading off to the handset in this picture.) 

revo_dive.jpg

And the last pic is the connection method I use. V strap fitted under the top row of bolts, which by the way are some obscure
european crap- better change them out for some good old fashioned phillips head machine screws, or you will have to carry
your special screwdriver around to open it up, cause this thing positively fills up with rocks. The bottom connectors are similar,
just very short straps that connect to my tank attachment cups. This might not work if you have the new door handle thingies
that everyone is using these days to connect tanks, but I am not so encumbered.

Jason Richards
NSS 41539
(rchrds here)

revo_vstrap.jpg

Questions answered about building a BP60

IMG_0550.JPG

This is an old repost from Rebreather World.

Why build up a BP30 BP60 BP240 and how much?

This post is in response to a question that was PMd, to me, that I thought would answer some other lurkers questions as well, as this is not the first time that I have been asked. I believe I reflected a less detailed answer in another thread as well.

Jason
 

 Originally Posted by WartedEmperor

How much time and money would I have to put into it if I did it all right the first time?

----------------------------------------------------

This is a difficult question to answer, and depending on who you ask, you might get a couple of answers. That I know of, there are only two people still diving their BP60 conversions, myself and Mark Munro, and of us, Mark has severely slowed working on his due to a near fatality, and I have been going forward with mine, using it as a platform for remote cave exploration. Right off, that should tell you something about the unit. It is not the ideal combination of utility, cost and usefulness, nor is it particularly simple to convert into a safe, diveable unit. I have a particular reason that I stick with mine, and that has mostly to do with small size and portability. However, I do still consider it a good way to start, and with a couple of molding differences, it could really be a very good rebreather. unfortunately, new molds are not going to happen, so some shortfalls must be expected.

With that disclaimer aside, let me try to answer your question in as verbose and round about manner as possible.

First, some other divers gave me an idea of your background, so let me start with how I think would be most prudent to continue with a BP-60. I stand by my initial assessment of starting with an oxygen only system and progressing from there. If you manage to procure a complete unit (30,60,240), they all have the same basic structure and vary only at the scrubber depth and stainless steel cover size) you will have perhaps half the parts required to start a diveable unit. I will give you the rough outline in steps that you will need, and try to guesstimate how much you might spend in making the conversion.

-----------------------------------------------------------------
BP-60 to O2 rig. $745 - $1590

1. Rotate the counterlung housing so that the hoses point towards your head. $0
2. Space the counterlung housing off of the plastic baseplate and/or increase the number of holes to allow better water flow to the diapharagm. $0-5 depending on what hardware you have around the house.
3. Scavenging the MAV (Manual Addition Valve) and DAV (Diluent Addition Valve) fittings, reconfigure the piping so that you have straight oxygen addition with no continous injection. $40-50 in stainless swagelock fittings and brass or stainless piping, assuming you have a small pipebender. If you jack the fittings up removing them , you can triple that price to $150, those fittings are NOT cheap.
4. If you choose to use the original tank (not the best idea) you will find it is not enough gas for the duration of your scrubber at depth (60 max feet for short durations, 30 max normal, check navy O2 tables) and you will want to replace it with a 13cf tank, which will definitely be sufficient for a 30, probably for a 60, and maybe not for a 240, and first stage regulator. $250
5. Plug the extra port in the DAV. $0
6. Purchase appropriate hoses- $95 (depending on source, may be much more)
7. Purchase DSV (Dive Surface Valve) or BOV(Bail out Valve). Here is a major argument- I have both, and I will never again dive on a simple DSV. There is just no reason to, as if you have a CO2 event, you WILL NOT be able to switch back to an open circuit regulator in time. Trust me. I learned the hard way. Golem BOV $900. If you are an idiot, the cheapest DSV I found that worked was about $350. You might be able to build a serviceable piece of crap from plumbing parts- $25
8. Plumb your BOV into your O2 bottle- $10
9. Add a constant addition orifice- $130 for the orifice and filters, $55 for the volumetric tester to check it before every dive. This is not really necessary, as the DAV will add every time you need gas, but can make breathing easier, as you are basically breathing through a tire valve otherwise.

That's probably it- you don't have to worry about decompression, you cant go below 30 feet really, but you can cruise around in the shallows for a significant period of time, and for some that is a really good start. The nice part, is you have bought one of the really expensive parts already (the BOV) which you can move around to other units later.

------------------------------------------------------------------------------
BP60- Oxygen to Mixed Gas (In addition to the high number above)
$608, if you are a machinist, and you hate dive computers.
$1410, if you are not a machinist, and you hate dive computers.
$3410, if you like to know what your decompression is based on what you really are diving, and you are not a machinist.


Now you have to fix some of the critical issues with the system, as you will be going deeper and with gasses that would not be suitable for a direct ascent to the surface. For your benefit, I have tried to include two prices- that if you happen to be a machinist, or are good friends with one (free work), and if you might have to be paying for one-off production (cause nobody else is doing this.)

1. First, the breathing path of the BP-60 is not optimal. depending on how you plumb it, there is an obstruction in either the inlet or exit tube from the diapharagm housing that severely limits gas flow. Mark Munro found this out the hard way. The BP-series will NOT flow enough gas through the loop to sustain a heavy breathing diver during high exertion events. This is particularly true at depth, where the density of the gas increases, and worsens the effect. You have two options in this case- control your breathing, (not always possible), or go to open circuit on the BOV. Mark and I looked at making a piece to add into the counterlung housing mold that would alleviate this problem, but he had lost interest in diving the unit, and I found it easier to go to OC on my BOV instead of chopping up hard to find BP-60 counterlung housings. The best you can do to reduce breathing effort is to make the path of water flow to the counterlung as unrestricted as possible. The original housing was designed to move air, not water through the ports, and as such provides insufficient flow. There were a number of answers to this problem in the early days, one of the best of which was to space the counterlung housing off of the original plastic backplate using machined spacers- leaving a 1/4-3/8 inch gap all the way around the bottom, But resulted in having to replace the counterlung spring to provide the same amount of inhalation assistance. This provided enough flow, while retaining the original backplate. I went a different direction, losing the backplate all together, and developing a steel bracket which retains the original spring length, but completely opens up the counterlung, preventing wetsuit and drysuit from blocking the inlet ports. New spring and machined spacer $250, Steel retention plate (of my design) $200, If you can cut and bend your own $18

2. You are now going to have to figure out a manual addition O2 valve, in addition to the orifice that you should have installed in step one. There are a couple of ways to go about this- You can buy an all in one unit/swagelock nightmare from a number of sources ($??) but I'm not even sure most places will sell such a thing without some proof of certification in their specific unit, you can cobble one together off the internet from swagelock parts ($200) and I think I saw one that some guy in europe was making, very smooth unit, around $500? Can't remember. Or you can build one similar to mine ($500 if you don't tell the machinist what it is for) or $150 if you can cut it yourself (some parts and special tools.)

3. Now, you will still have a fiesta of cabling and hoses, which you can probably just shove under the housing, or you can do an arrangement like mine, with the bulkhead bracket and special fittings. ($600 in machining, $80 if you can cut and machine it all yourself.)

4. From there you are left with a way to secure bottles. For now, everything I do is offboard, so no special bracketry. but you will need the quick release fittings from swagelock. Not cheap at all. $200.

5. You will also need a way to monitor your gas mixture. You can buy and assemble a munro board and build a housing $60, and then machine a holder for the sensors, as well as run the cabling and such (another $100). Or you can have someone else do it for you ($250) or you can install an X1 and X-link or a Shearwater. (2000-2400 when all done) Without the computer, you are flying blind decompression wise, and will eventually bend yourself, or spend an inordinate amount of time watching your PO2 display.

--------------------------------------------------------------------------------------------
So just off hand, that is what i came up with.

You can see that obviously, (though it didn't seem so at the time) money is not the reason that I dive my BP-60.
I could easily have saved all this money (Nearly $4600 and I am an amateur machinist) and bought something nice like a Kiss Classic, or something else. Anything else.
As it is, I can't step on a dive boat with my machine (no sane boat captain would let something like that on their boat without knowing me) and every time I come out of a popular cave (Jackson Blue, for instance) people react like they've seen the Creature from the Black Lagoon. I invariable get one or two side comments (not always directly) about how I am going to kill myself on that piece of shit, thus my naming it the Deathbox.
On the upside- It is, by far, the smallest 4 hour duration rebreather available. It is also one of the cleanest, in the sense of configuration on the body. There are no hoses or counterlungs or any of that stuff on the chest.
I also get the satisfaction of diving something I have built with my own hands, with parts that I designed with my own flawed brain. I enjoy the modeling in 3D cad, and the machining, almost as much as actually diving it.

If this does not sound like the types of motivations that are making you want to get a BP-series machine, I would seriously consider saving up the bucks, or crashing the Visa, and getting a production rebreather. You will get a phone number to someone who cares when you have problems. I will give you my email, but I can't guarantee that I will care if you have problems with your BP series machine- and good luck finding anyone else who will.

Hope this answers your (and anyone else's) questions. If you wish to go forward with your project, send me some pictures of where you are at on it, and I will be happy to converse with you via email, about the best way to go forward, and as I switch from Inventor to Solidworks, I will be happy to share some of my drawings.

Thanks,

Jason

Deathbox in action, Mexico- 200 feet and mixed gas! And some notes...

BP60 in Mexico.jpg

Homebuilds in action!
So- here is a little hot action from my Bp60- just returned from 10 days in the Yucatan helping UADY (university in Merida) catalog cenotes with archaeological artifacts, and check for new cave- Found a cave with more tha 3000 feet of passage- connected two huge rooms with some passage between 160 and 190 and passage that led off in two directions for a bit. Three dives in three days completed on the BP-60- each four hours long (my safe limit on my scrubber is 4 hours), doing various stuff- laying line, survey, removing line, bla bla bla. The breather clips on over my sidemount rig, which this trip consisted of weighted 80s and an offboard 40 of O2, as we couldnt figure out a way to fill the onboard 13cf O2 tank. (No proper fill adapters.) Anyway, the pic is me adding an archeo line to nearby artifacts so they could be added to the survey.

Jason

Re: My BP-60 success story!

So- an update on the Biopak 60, as a couple of people have been asking.

After returning from the Yucatan (see post pic above) the machine got a few straight weeks of use in Florida, where a friend of mine, and ADV contributing author Jon Bojar, took some photos for me. In addition, the machine got a dive at Blue Spring Resurgence, in Tennessee, one of the projects that Chrissy and I have been working on for the last couple of years.
Some things I have learned:
I still, consistently get 4 hours of burn time out of this "60 minute" scrubber. This is true in both Florida 72 degree water and Tennessee 50 degree water. I was sure that we would have to insulate the can somehow, but that has not proven to be the case. My attempt at rigging an in water self-donning harness has not been a success. In Tennessee, the cave requires that the machine be pushed approximately 150 feet into the cave before it can be donned- this was quite the pain in the ass, as it does not float level, and is quite difficult to manage through tight areas with one hand. In addition, Chrissy had to make all of the attachments for me, as I was unsure that I would be able to get to them in the cave. We got it on, and the dive continued (horrific 2 foot viz for four hours) and it worked just fine throughout the dive, but not being able to don the machine myself pretty severly limits my intent for it. More thought will go into this part. 
I still have not managed to purchase a quality gas readout and decompression computer to the machine, but that is coming- Shearwater or the new X1 system will be in hand before the end of 09.
As for other lessons learned:
1. The barbed fittings used on the connections for the orifice and pre- and post filters are inadequate. I have found that if the machine sits in the hot sun, the tubing becomes soft enough that under pressure, it will separate from the barbed fittings. Don't know how this did not happen earlier, but it finally did in Florida, and so now I know. I have a few options open for swagelock type fittings, and possibly even the push-lock fittings, to replace the barb orifice, but the price will not be anywhere near as attractive. 
2. My skills with the silver solder are not top notch- the brass tube fit to the fore banjo nut shown in the left side picture has come loose again and leaks gas. This is surely a technique issue, as there is almost 3/8" of contact area between the inner wall of the orifice and the tube, so there should be plenty of solder area available. Lessons to learn. 
3. The K1D sensors in use have a depressingly short life span. One of the sensors is already giving up the ghost, so I will have to change to a different sensor, but that will be a matter of cutting a new sensor block mount, hardly a difficult project.
4. The diluent and oxygen addition buttons are STILL the same shape. This is not acceptable at all, as the addition manifold is not within view without removing it from its bungee attachment at the right shoulder. The only saving grace is that the gas content changes so slowly it doesn't really matter what button you push, as long as you are watching the readout when you do it, you can figure it out pretty quick. It also helps that I NEVER have had to manually add diluent. I might ask why I even have the diluent button. You never know, I suppose. Anyway, easy fix- hour or two at the mill/lathe.
5. As mentioned above, attachment harness works well for surface don/doff, but hardly at all in water, and this will have to be addressed. 
6. I am not completely happy with the oxygen mounting business- There are some dives where I would like to have the tank mounted to the machine itself, to clear me of stage bottles, but the amount of gas consumed in four hours (about 2/3 of a 30, after bumping it up for deco) makes for a strange bottle configuration. Mounting the bottle on the bottom makes the whole thing very ass heavy, and if I went to put it on either side, I would probably have to use two bottles, more than I need. More thought on that later.
7. Deep. Hard to say what is up here. I have made four hour dives at 160 feet, which is as deep as this machine has been, but I would like to take it deeper and see how she works out. Antecdotal reports indicate that I may be able to use the system deeper, switching to manual oxygen addition, but we will see. I would also like to experiment with a non-fixed IP first stage and see how that works out. Stuff to play with later.

Thanks, for those that have been reading these and building their own machines- good luck with yours, hope to see you ALIVE in the water!

jason
The running joke on rebreatherworld at the time.

The running joke on rebreatherworld at the time.

The first breaths of the "Deathbox" Biopak 30/60

My BP-60 success story!

Well, after a few (ahem) years of working on my pet BP-60 project, I met with success today- 45 minute bottom time (in cave) at 90 feet- 2.6 cf of diluent consumed! Yea!

I've been working on this project for some time as a gas extender for my sidemount rig- It has had a few dives prior to this, but all O2 only, as the Munro board had not been installed. Got that finished last month.
 
Home manufactured bulkhead fittings for scuba to push-to-connect fittings, and handmade banjo fittings to replace the originals.

Home manufactured bulkhead fittings for scuba to push-to-connect fittings, and handmade banjo fittings to replace the originals.


There are a lot of proof-of-concept items on the rig, not the least of which are Legris push to connect fittings and plastic 250PSI tubing used throughout. (Which, I am happy to report, doesn't leak at all, and is SUPER easy to work with.) 

A good view of the plastic orifice and filters, inline on the tubing. Ultimately, the did not stay in place when the tubing got hot, and the pressure popped them apart. Had to switch to stainless filters with compression fittings.

A good view of the plastic orifice and filters, inline on the tubing. Ultimately, the did not stay in place when the tubing got hot, and the pressure popped them apart. Had to switch to stainless filters with compression fittings.


The basic BP60 counterlung case, diapharagm, scrubber, cover, and ADV are really the only parts I have kept, everything else was binned. The counterlung and steel cover will soon be replaced with a deeper version, in hopes of increasing the run time and reducing the possibility of early breakthrough. (Haven't seen it yet.)

The counterlung case is mounted on a homemade stainless steel frame which provides bulkheads for mounting all the hose connections. This is also connected to a lower steel frame that provides the connection for the harness straps (really only straps that attach to my sidemount harness) and retains the counterlung return spring.) These two parts add just enough weight to make the rig neutral with the counterlung partially filled, and completely eliminate the plastic housing that added breathing resistance.
 

The retaining plate that replaced the original plastic plate.

The retaining plate that replaced the original plastic plate.


Both Oxygen and Diluent are offboard, using Swakelok DESO quick connects. Oxygen addition is via a miniature plastic orifice, which just happens to have barb fittings that fit into the plastic tubing used in all the Legris fittings. Inline barbed filter on either side. (Had an earlier orifice get clogged between dives before I added the filters- the jury is still out on the filters.) The orifice and filters are so cheap I have a box of them in case it turns into a problem.

Manual Oxygen and Diluent addition are also included via a dual inflator handset, Oxygen on one side, Diluent on the other. This works fantastically, though in the future, the buttons will become different shapes, as in a pinch, it might be easy to add the wrong gas, as they feel the same even though they are on opposite sides of the handset. 
 

handmade two button diluent and oxygen addition. 10 years later, and it is still smaller than anything else on the market.

handmade two button diluent and oxygen addition. 10 years later, and it is still smaller than anything else on the market.


I now have one of Jacob's BOV (golem gear) which I am sorry to say actually breathes better in OC mode than most of my regulators. :D I have to agree with all that this is a fantastic piece of kit, and even the slightest hint of overbreathing the scrubber and I am off on OC, with a quick twist. 

The sensors are a bank of K1Ds (only thing I could fit) run to a Munro V1 board, which works very well, but is a little ungainly and large, and I will eventually build a much smaller one, perhaps with one of his new boards! :)

The "Munro" board.

The "Munro" board.

And for the dive report- Mounted the BP60 on the back of my sidemount rig (SM120s). This still leaves my chest area clear, which I like, as this is the deployment area for my OC regulators (attached to a neck loop.) The loop hoses are a little short, which means there is just enough room for the BOV to sit away from my mouth while standing, and is a little snug around the neck, but when in the water, it seems to work fine, and I can turn my head, without the hoses floating, despite having no hose weights. The LP hose feeding the BOV is a little long, so that flaps somewhat. 

First dives on the unit- at JB, in the lower cavern. Hands up, heads up display.

First dives on the unit- at JB, in the lower cavern. Hands up, heads up display.

The addition handset sits over my right shoulder d-ring (mirrors my wing inflator on the other side) and is very easy to reach, and actually, you can see it with the loop in your mouth. 
Once in the water, with the O2 bottle turned on and plugged in, the O2 level slowly climbs, as it should, so I prebreathed the rig for a couple of minutes to bring the loop O2 down, introduce fresh diluent and heat up the scrubber. 

Once that is all under control, my safety diver and I decend into the cavern (which is crystal clear blue today) and we start a slow swim into the cave, with me eyeballing the display every second or so. (OK, I'm actually holding it in one hand, my light in the other.) As we decend in depth the ADV adds gas before it gets difficult to breath, and the PO2 increases as it should. Once at depth (90 feet) the O2 remains very stable, which means I have the O2 set right, at 0.5 LPM. We swim at varying rates so I can get a feel for how the machine will work, how easy it is to overbreath, etc.
 

Exiting the cave, before there was grass.

Exiting the cave, before there was grass.


A comparison- Two weeks ago I dove a friend's KISS Classic. Though I really like that machine (I will eventually have to buy one) the BP-60 breathes a little better than the Kiss, and the ADV is certainly easier to operate, though I understand that is intentional on the part of the Kiss. I felt like I had to suck my lungs out to activate the ADV on the kiss- the BP60 added just as I needed it. I dislike the diluent manual add on the Kiss- though in truth, I'm not really sure when you would have to manually add diluent when you could just exhale from the mask, but having the diluent add easily accessible was nice. (Never had to use it, so hmmm.) O2 manual addition is very similar in feel, though I like having it on a short and controlled hose, rather than flying around like the Kiss one. Only used that to boost O2 for deco. Overall, the BP60 is lighter, and a bit tail heavy, due to my use of a rear-mounted AL14 for O2, the Kiss was perfectly balanced when bolted to the back of my sidemount rig. I liked the pendant display on the Kiss, will soon have one similar on the BP60. 
 

The R22D sensors and Liquivision X1 with datalink. If not for the batteries, probably one of the best computers I have ever owned.

The R22D sensors and Liquivision X1 with datalink. If not for the batteries, probably one of the best computers I have ever owned.


Some notes.

The scrubber can definately be overbreathed. I intentionally tried to overwork it, swimming really fast against the flow, and after about 20 seconds switched to OC for a couple of breaths and purged the loop. This took care of the problem, but for an extended heavy swim, I might be in trouble. However, even If I had to switch back and forth, I would save more gas than if I was just OC. 

The feed hose for the BOV is too long- it swings wide of the rest of the hoses. 

Another 2 inches of loop hose length wouldn't hurt. 

Anyway, hope someone got something out of this- no pictures of yet, I dont know anyone here with a camera and spare time, but I will try to add a couple of captures of the CAD drawings which show the frame parts and the handset.

jason